

When the sweltering heat of a Texas summer arrives or the unexpected winter chill sets in, your home’s comfort relies entirely on the efficiency of your heating and cooling system. A high-performing unit doesn’t just happen by chance; it begins with a flawless HVAC installation. Whether you are upgrading an outdated unit, building a new home, or simply looking to improve your indoor air quality and lower energy bills, understanding the installation process is vital.
Investing in a new climate control system is one of the most significant upgrades you can make to your property. However, even the most expensive, top-tier equipment will underperform if it isn’t installed correctly. In this comprehensive guide, we will walk you through the signs that it is time for an upgrade, how to choose the right equipment, what to expect during the HVAC installation process, and why partnering with the experts at Bee Cool Texas is your best choice for long-term comfort.
Signs You Need a New HVAC Installation
Before diving into the specifics of purchasing a new unit, it is crucial to determine if a full heating and cooling system upgrade is actually necessary. While minor issues can often be repaired, there comes a point where replacing the system is more cost-effective. Here are the top indicators that it is time for a new installation:
-
System Age: The average lifespan of a central air conditioner or heat pump is 10 to 15 years, while furnaces can last up to 20 years. If your system is approaching or has surpassed these benchmarks, a replacement is imminent. Older systems, especially those relying on phased-out R-22 Freon, are incredibly expensive to repair.
-
Rising Energy Bills: Have your monthly utility costs steadily increased despite your usage remaining the same? As systems age, they lose efficiency, working twice as hard to produce the same level of comfort.
-
Frequent and Costly Repairs: If you are constantly calling a technician to patch up a failing unit, you are likely throwing good money after bad. A general rule of thumb is the “$5,000 rule” multiply the age of your equipment by the estimated repair cost. If the total exceeds $5,000, replacing it is the smarter financial move.
-
Inconsistent Temperatures: Are certain rooms in your home freezing while others are uncomfortably hot? Uneven cooling and heating often indicate a failing compressor, severe ductwork issues, or an improperly sized unit.
-
Excessive Noise and Dust: Strange grinding, squealing, or rattling noises, along with an influx of dust in your home, point to serious internal issues that compromise indoor air quality and system integrity.
Choosing the Right System for Your Needs
A successful HVAC installation begins long before the physical labor starts; it begins with proper selection. Selecting the right equipment requires balancing your budget, home size, and efficiency goals.
Sizing Your Unit: The Importance of a Manual J Calculation
One of the most common mistakes in amateur installations is choosing a unit based solely on square footage. An oversized unit will short-cycle, failing to remove humidity from the air, while an undersized unit will run constantly, driving up energy bills. A professional HVAC contractor will perform a “Manual J Load Calculation.” This assessment considers your home’s square footage, ceiling height, insulation quality, window placement, and local climate to determine the exact heating and cooling capacity your home requires.
Understanding Efficiency Ratings
When investing in an energy-efficient HVAC system, you need to understand the industry ratings:
-
SEER2 (Seasonal Energy Efficiency Ratio 2): This measures cooling efficiency. The higher the SEER2 rating, the less energy the unit consumes. Modern minimums typically sit around 14.3 to 15 SEER2, depending on your region, but high-efficiency models can exceed 20 SEER2.
-
AFUE (Annual Fuel Utilization Efficiency): This measures furnace efficiency. A 95% AFUE rating means 95% of the fuel is converted into usable heat, while only 5% escapes as exhaust.
-
HSPF2 (Heating Seasonal Performance Factor 2): This applies to heat pumps and measures heating efficiency over the winter season.
Exploring System Types
There is no one-size-fits-all solution for residential comfort. Depending on your home’s architecture and your personal preferences, you might consider:
-
Standard Split Systems: The most common setup, featuring an outdoor compressor and an indoor air handler.
-
Packaged Systems: Both heating and cooling components are housed in a single outdoor cabinet, ideal for homes with limited indoor space.
-
Ductless Mini-Splits: Perfect for home additions, garages, or older homes without existing ductwork. These provide zoned temperature control with incredible efficiency.
-
Heat Pumps: Extremely popular in Texas, heat pumps transfer heat rather than generating it, providing both cooling in the summer and highly efficient heating in the winter.
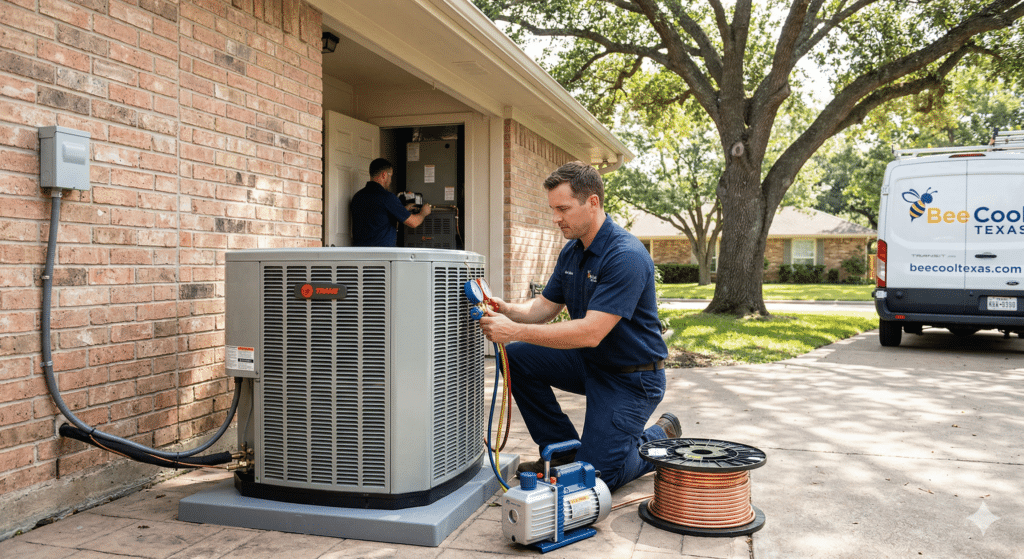
The HVAC Installation Process: What to Expect
Knowing what happens on installation day can alleviate anxiety and help you prepare your home. A professional HVAC installation is a complex logistical operation that typically takes between one to three days, depending on the scope of the project.
Step 1: Pre-Installation Preparation
When the installation team arrives, their first priority is protecting your home. They will lay down drop cloths and floor runners to prevent damage to your flooring and prepare the work areas. Safety protocols are established before any tools are even lifted.
Step 2: Safe Removal of Old Equipment
The technicians will safely disconnect your old system. This includes the careful extraction and legal disposal of old refrigerant, adhering strictly to Environmental Protection Agency (EPA) guidelines. The old electrical wiring is disconnected, and the heavy outdoor and indoor units are removed from the property.
Step 3: Upgrading Ductwork and Infrastructure
If you are investing in a new AC replacement in Texas, your ductwork must be able to handle the new airflow. The team will inspect the existing ducts for leaks, damage, or improper sizing. They may need to fabricate custom sheet metal transitions to ensure the new indoor unit mates perfectly with your existing plenum, preventing air leaks that could ruin your new system’s efficiency.
Step 4: Installing the New Equipment
The new outdoor condenser is placed on a leveled composite or concrete pad to minimize vibration and prevent moisture damage. The indoor air handler or furnace is carefully positioned in the attic, basement, or utility closet. Once in place, the technicians will run new copper refrigerant lines (or thoroughly flush the existing ones), connect the high-voltage and low-voltage electrical wiring, and attach the condensate drain lines.
Step 5: Final Testing and Quality Assurance
A true professional does not just turn the system on and walk away. The final step involves pulling a deep vacuum on the refrigerant lines to remove any moisture and air, ensuring a pure charge. The system is then charged with refrigerant, and the technicians test the airflow, check electrical draws, calibrate the thermostat, and measure the temperature drop across the coils.
Why DIY Fails: The Value of a Professional HVAC Contractor
In the age of online tutorials, some homeowners may be tempted to attempt their own installation to save on the central air installation cost. This is a dangerous and costly mistake. Here is why you must hire a professional HVAC contractor:
-
Safety Hazards: HVAC systems involve high-voltage electricity, highly pressurized refrigerants, and, in the case of gas furnaces, combustible fuels and carbon monoxide. One wrong connection can result in catastrophic damage, fire, or severe health risks.
-
Voided Warranties: Almost all major HVAC manufacturers (such as Trane, Carrier, Lennox, and Goodman) explicitly state that their 10-year warranties are completely void if the system is not installed by a licensed and certified professional.
-
Specialized Tools: Proper installation requires expensive, specialized tools like vacuum pumps, micron gauges, refrigerant recovery machines, and specialized pipe-brazing equipment that the average homeowner does not possess.
-
Code Compliance: Licensed professionals understand local building codes and will ensure that your installation passes municipal inspections, keeping your home legal and safe.
Understanding the Costs of Installation
It is natural to wonder about the financial investment required. The cost of an HVAC installation varies widely based on several key factors:
-
System Size and Capacity: Larger homes require units with higher tonnage, which cost more.
-
Efficiency Ratings: High-SEER2 and variable-speed systems come with a higher upfront price tag but pay for themselves over time through dramatically reduced energy bills.
-
Ductwork Modifications: If your home requires extensive duct repair, sealing, or replacement, this will add to the overall labor and material costs.
-
Labor Complexities: Installing a unit in a tight, difficult-to-reach attic will naturally require more labor hours than an easily accessible ground-floor utility closet.
While the upfront cost can seem daunting, consider it a long-term investment in your home’s value and your family’s daily comfort.
Maximizing the Lifespan of Your New System
Once your new HVAC installation is complete, proactive maintenance is the key to protecting your investment. To ensure your system lasts for decades, follow these best practices:
-
Change Filters Regularly: A dirty air filter restricts airflow, causing the system to overheat and freeze up. Check your filters monthly and replace them at least every 90 days (or more frequently if you have pets).
-
Keep the Outdoor Unit Clear: Ensure there is at least two feet of clearance around your outdoor condenser. Trim back bushes, remove leaves, and sweep away debris to allow for proper heat exhaust.
-
Schedule Annual Tune-Ups: Just like a car needs oil changes, your HVAC system needs professional maintenance. Schedule a cooling tune-up in the spring and a heating tune-up in the fall. A technician will clean the coils, check refrigerant levels, and tighten electrical connections to prevent sudden breakdowns.
-
Utilize a Smart Thermostat: A programmable or smart thermostat reduces the strain on your system by automatically adjusting temperatures when you are away from home, saving both wear-and-tear and energy costs.
Ready for a Seamless HVAC Installation?
A professional HVAC installation is the ultimate key to achieving reliable, energy-efficient comfort in your home. From selecting the perfectly sized, highly efficient unit to the meticulous execution of the physical installation, every step matters. Refusing to cut corners ensures that you will enjoy lower utility bills, improved indoor air quality, and peace of mind for years to come.
If your current system is failing to keep up with the Texas weather, do not wait until you are left sweating in the middle of July or shivering in January. Trust the experts to handle the heavy lifting.
Ready to upgrade your home’s comfort? Contact the experienced team at Bee Cool Texas today. Our certified technicians are ready to provide you with a transparent consultation, expert recommendations, and a flawless installation tailored to your unique home. Call us now to schedule your free estimate and take the first step toward ultimate indoor comfort!